WordPress in maintenance mode and you are not sure what to do? No need to panic. You have come to the right place and we are going to easily guide you through the simplest process to fix the fact that WordPress in maintenance mode and it is causing your website not to display correctly. It is never fun when you are in a situation where your website is not loading and the content is not visible.
 = The reaction most users have in this situation.
 = How you will feel by the end of this post
There is a built-in process that happens when you update any of the software on your WordPress site. In order to allow these updates to complete without any issues WordPress put your website in an automatic maintenance mode. The reason for this is so that visitors will not see any errors while the updates are running and users that have access to the administrative area will not be making changes while updates are running as well.
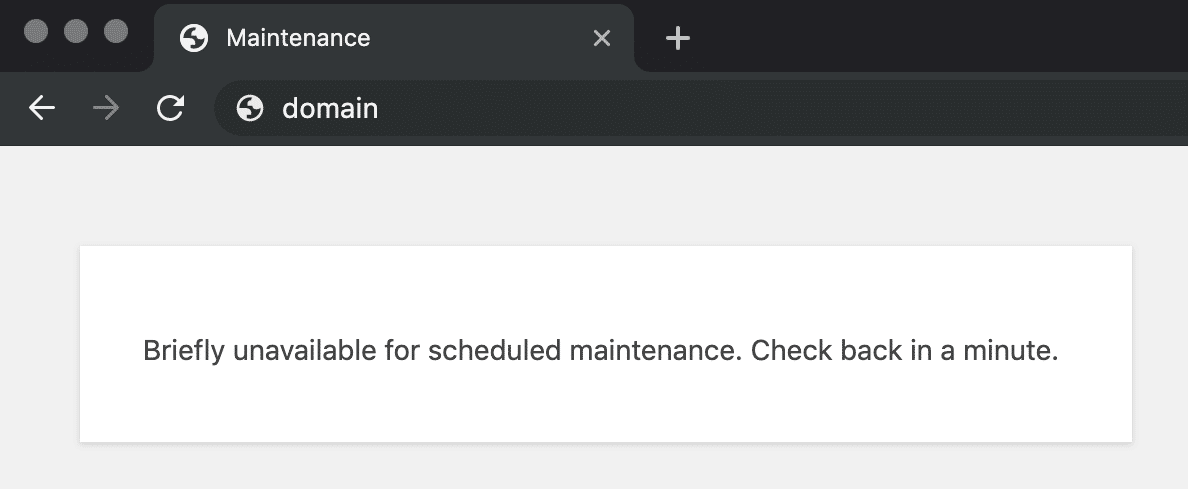
When WordPress updates, it automatically installs a .maintenance file. Following the upgrade, you may receive a message that says “Briefly unavailable for scheduled maintenance. Please check back in a minute.” WordPress in Maintenance Mode is now in full effect. The meaning of this is that the .maintenance file was not removed properly after the updates were completed.
The code below is the actual contents of this .maintenance file. Now this information is not necessarily useful in fixing your WordPress in maintenance mode issue but we thought that we would just show you exactly what is inside of this file.
 CODE IN .MAINTENANCE FILE:
<?php $upgrading = time();?>
So now that you have a bit more understanding about WordPress in maintenance mode, let us walk you through the steps that you can take to get this issue resolved and your website back up and running smoothly.
Find .Maintenance File to Fix WordPress in Maintenance Mode
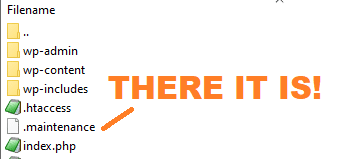
If you currently have WordPress in maintenance mode it means that you are not able to access your website both in the front end or in the administrative area. The reason for this is because of that .maintenance file that has been created and not properly removed after the update process completed. The first step is to navigate to location of this file within your server file structure.
The good news with this step is that this file is absolutely always in the same location no matter what website. The .maintenance file that was created during your update process will reside in the root directory of your WordPress installation.
This is the area of your web hosting space where your WordPress website files are installed. There is a great article at the link below which will break down the WordPress file structure and shed some more light as to what the root directory of a WordPress installation consists of.
https://www.wpbeginner.com/beginners-guide/beginners-guide-to-wordpress-file-and-directory-structure/
Below is an image showing a simple example of where this .maintenance file would be located in a WordPress installation.

Remove .Maintenance File to Fix WordPress in Maintenance Mode
So now that you are fully aware of the exact location of the .maintenance file it’s now time to remove it. Removing this file from your WordPress installation will immediately take your WordPress site out of maintenance mode and have it loading as it should be.
Now there are two different methods that you can take action on to remove this .maintenance file off of your hosting account server. You can do this either by using your web hosting control panel’s File Manager or using FTP access. Let us take a moment and explain each one below.
Using Your Web Hosting Control Panel’s File Manager:
The majority of hosting accounts offer an interface within the web hosting control panel or hosting account that will allow you to access the file structure of your WordPress installation. If you have this type of interface inside of your hosting account you can navigate to the location of the .maintenance file and simply delete it.
 Once deleted you are in good shape and your site will be ready to serve the world again.
Using FTP Access:
The method above of using your web hosting control panel’s file manager is the easiest and quickest way to remove this .maintenance file but if you do not have a file manager inside of your hosting account the next possible way to do this would be using FTP access.
If you are unfamiliar with the use and process of connecting to your website files using FTP you can visit the URL below for a very simple walk through to educate yourself on FTP techniques and how to connect to your website.
https://www.wpbeginner.com/beginners-guide/how-to-use-ftp-to-upload-files-to-wordpress-for-beginners/
Once you have connected to your web hosting server and navigated to the location of the root folder of your WordPress installation you can simply delete the .maintenance file.
 Once deleted you are in good shape and your site will be ready to serve the world again.
In Conclusion
The WordPress in maintenance mode issue is a very common occurrence for WordPress users. The good news is that when it does happen it is a very simple correction that you can take action on in order to get your website running smoothly again. We hope that this post was helpful to get the issue resolved for you and are always available for your comments below.
WE CAN FIX THIS ISSUE FOR YOU RIGHT NOW
The post WordPress in Maintenance Mode – FIXED appeared first on WP Fix It.
from WP Fix It https://bit.ly/3kJdEq8
via IFTTT


Post a Comment
Don't try to insert your link to make Spam your comment.