Do you need to downgrade WordPress Version so your site will function again?
WE CAN DO THIS FOR YOU. See service at https://www.wpfixit.com/wordpress-support-service/
Downgrade WordPress Version – The Manual Way
Although having latest WordPress is good idea, but sometime you may wish to back to earlier version of WordPress installation. This can happen when your plugins do not work with new version and you have major theme issues.
Well, downgrade a new version of WordPress to older version is a easy task and that same as upgrading a WordPress to newer version.
- Make full back up of your site whatever you do first make backup of WordPress folder and database. You need to have access to your site control panel using ftp program such as Filezilla make a copy of all WordPress Platform files. These are located in the root directory of your host or the root directory of the location you installed WordPress.
- Delete wp-admin and wp-includes folder which are located in your default host directory.
- Get and download the old version of WordPress that you need from wordpress.org release-archive.
- Unzip your desired version of WordPress and overwrite all files EXCEPT wp-content folder to your website by using ftp program.
- Go to your site admin area this time you wont see WordPress admin login page. Instead you will notice a message that say WordPress Database needs to upgraded current WordPress to new one!!. do not worry, just click OK and you will then see the admin login box.
- Login to admin area and HAVE FUN!
Everything will be fine and you can enjoy old WordPress installation on new on WordPress.
Downgrade WordPress Version – The Plugin Way
The plugin “WP Downgrade” forces the WordPress update routine to perform the installation of a specified WordPress release. The Core Release you specify is then downloaded from wordpress.org and installed as would any regular update. You can permanently stay on a previous version of your choice or update selected.
Plug-in is absolutely amazing because you can downgrade WordPress version with just a few simple clicks and you do not have to go through the painful process of doing this manually as explained earlier in this article.
WP Downgrade | Specific Core Version has the potential for becoming one of the best-loved plugins among those, who simply cannot update to the latest WP release.
In the past the latest WP release was the only offering for WP’s Automatic Update routine. This left all those behind, who have to wait with Core updates, until their plugins become compatible with newer WP releases. When this finally happens, more often than not there has already been yet another Core update. In the end a dreaded, cumbersome, time-consuming and error-prone Manual Update used to be the only way to go.
With WP Downgrade | Specific Core Version this is now a thing of the past. Anyone who lags behind the latest WP release is now able to use Automatic Updates even to lower WP versions. What WP Downgrade does simply is to make WP believe that the version you want to update to actually is the latest version. Because of this, there is no difference to updating to the latest version.
For security reasons I think this is a must-have plugin for anyone running a “seasoned” WP installation, and it actually should be a Core feature to be able to update not to the latest WP release exclusively but instead to have a choice among secure releases.


Installation
THE EASIEST WAY:
- Go to Plugins -> Install in your WordPress backend and search for “WP Downgrade”.
- Click in the hit list for “WP Downgrade” on “Install now”
- Activate the plugin
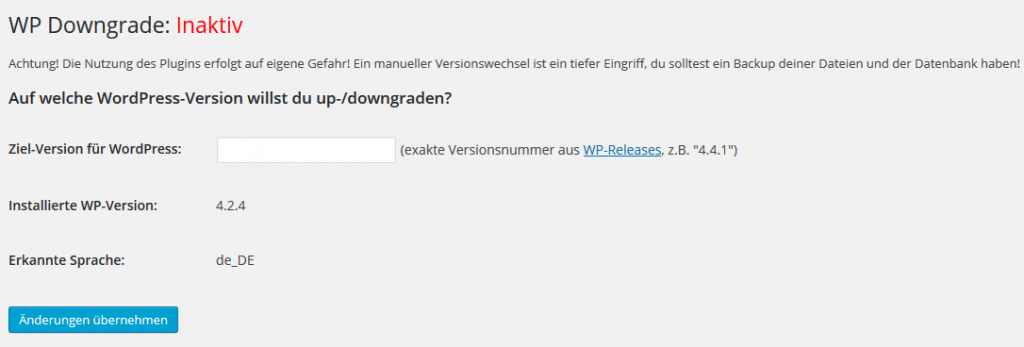
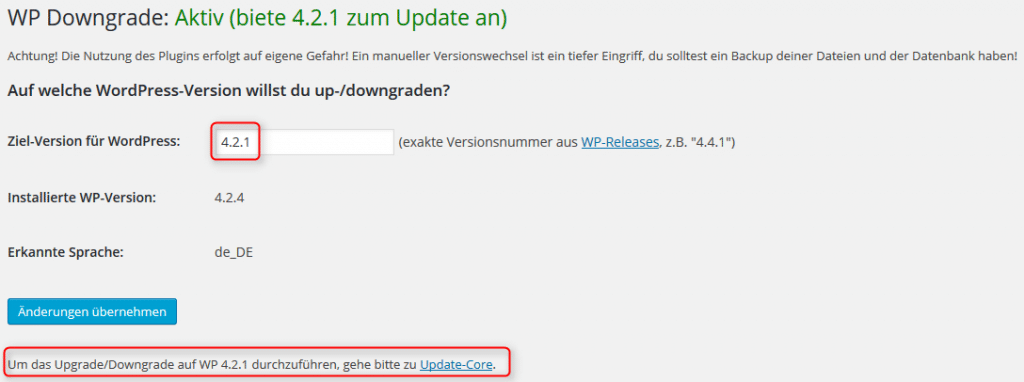
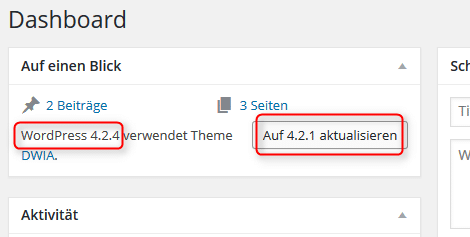
- Now you will find a new item called “WP Downgrade” under “Settings”. There you can store the desired core version number and then carry out the WordPress update.
THE MANUAL WAY:
- Download the plugin
- Unzip the zip file
- Upload the entire folder
wp-downgradeto the directory/wp-content/plugins/on your blog via FTP - Go to Plugins in your WordPress backend and activate the plugin
- Now you will find a new item called “WP Downgrade” under “Settings”. There you can store the desired core version number and then carry out the WordPress update.
WE CAN DO THIS FOR YOU. See service at https://www.wpfixit.com/wordpress-support-service/
from WP Fix It https://bit.ly/3iY97jq
via IFTTT

Post a Comment
Don't try to insert your link to make Spam your comment.